

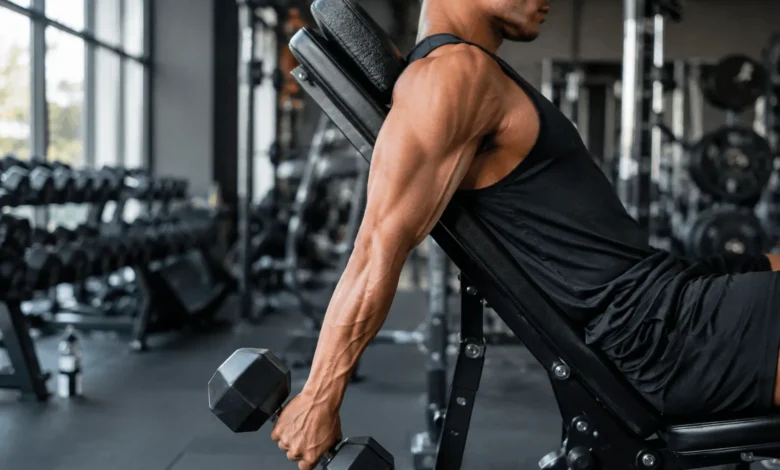
The incline dumbbell curl is a seated biceps exercise performed on an angled bench, and it works by stretching the biceps behind the body before you curl, which increases tension on the long head of the muscle compared to a standing curl. You set the bench between 30 and 60 degrees, let the dumbbells hang straight down with your arms behind your torso, and curl from a deep stretch to a full contraction.
Most lifters default to standing curls because they are easy to load heavy and easy to cheat. The incline curl removes that option. Your back is pinned to the pad, your shoulders can’t swing, and the only muscle left to do the work is the one you’re trying to grow.
What The Incline Dumbbell Curl Actually Targets
1.Biceps Brachii, Long Head
The biceps brachii has two heads, and the long head is the one that creates the peak lifters chase. Because the incline position pulls your arms behind the plane of your torso, the long head starts the rep already lengthened, and that added stretch under load is one of the more reliable triggers for hypertrophy in resistance training research.
A steeper incline, closer to 60 degrees, increases this stretch further. A shallower incline, closer to 30 degrees, keeps more tension through the middle of the range and can feel more comfortable on the shoulder joint.
2.Biceps Brachii, Short Head, and Brachialis
The short head assists through the top half of the curl and contributes to overall arm width. The brachialis, a muscle that sits underneath the biceps, also fires throughout the movement and adds thickness to the upper arm independent of biceps peak.
Switching to a neutral, palms-in grip on the same bench shifts more emphasis onto the brachialis and the brachioradialis in the forearm. Alternating grips across sessions is a simple way to develop the arm from more than one angle without adding extra exercises.
3.Forearm Flexors
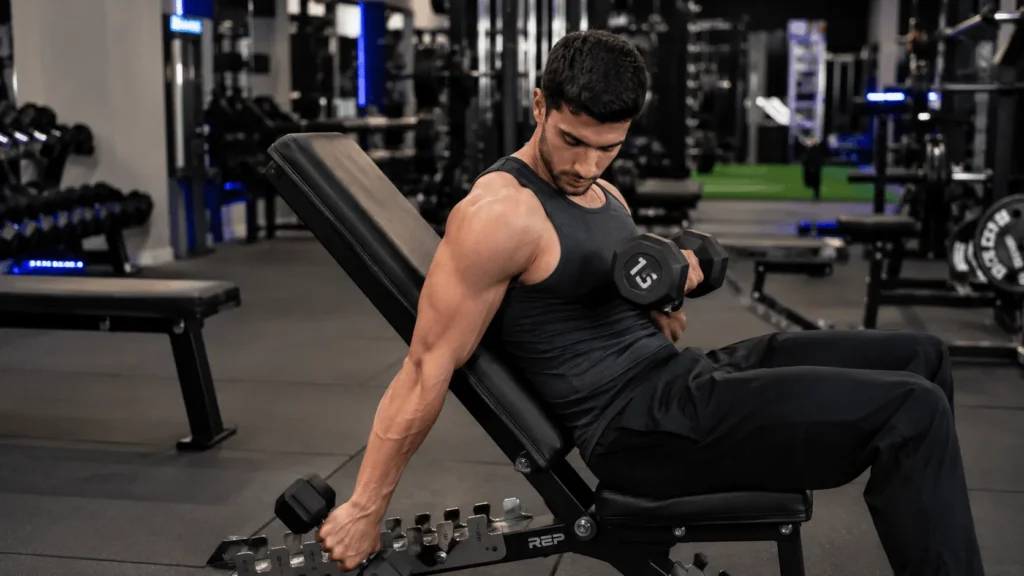
Holding a dumbbell through a full stretch and full contraction also loads the forearm flexors and the brachioradialis, particularly on the lowering phase. Over time this carries over to grip endurance in other pulling and pressing work.
How To Do The Incline Dumbbell Curl Step By Step
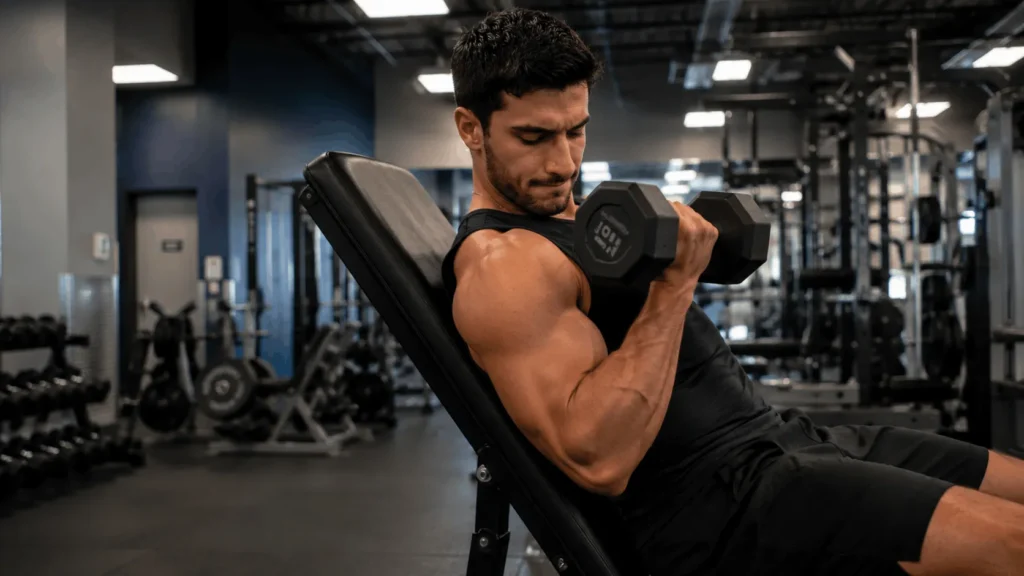
Keep your upper arms still against the pad for the entire set. Curl both dumbbells up by bending at the elbow only, without letting your shoulders roll forward or your elbows drift ahead of your body.
Squeeze at the top for a one count, then lower the dumbbells under control, taking two to three seconds to return to the fully stretched starting position. Resist the urge to let the weights drop; the lowering phase is where most of the muscle damage that drives growth actually happens.
Repeat for the prescribed reps, alternating arms or curling both together depending on your program. Either style works; alternating can let you focus more attention on each rep, while curling together saves time.
Common Incline Dumbbell Curl Mistakes
1.Choosing A Bench Angle That’s Too Flat
Setting the bench too close to horizontal turns the exercise into a slightly awkward standing curl. You lose the extended stretch behind the torso, which is the entire point of the incline setup. Stay above 30 degrees so your arms hang meaningfully behind your body at the bottom of the rep.
2.Letting The Elbows Drift Forward
As the weight gets heavy, it’s tempting to let the elbows creep in front of the torso, which shortens the range and lets the shoulders take over. Keep your upper arms pinned to your sides or against the bench pad, and treat any forward drift as a signal to drop the weight.
3.Rushing The Eccentric
Dropping the dumbbells quickly on the way down skips the phase of the lift that does the most for muscle growth. Aim for a controlled two to three second lowering on every rep instead of letting gravity do the work.
4.Going Too Heavy To Hit Full Range
Partial reps with heavy dumbbells will move more weight on paper, but they cut out the bottom stretch and the top contraction that make this exercise worth doing in the first place. Drop the load until you can complete a full range rep with strict form, then add weight gradually from there.
5.Skipping The Warm-Up Set
The stretched bottom position puts real load on the biceps tendon at the elbow and the front of the shoulder. A light warm-up set before your working sets reduces strain on both joints and lets you check your bench angle before loading up.
Incline Dumbbell Curl Variations
The neutral grip incline curl, often called an incline hammer curl, keeps your palms facing each other throughout the movement. It shifts emphasis toward the brachialis and brachioradialis and tends to feel easier on the wrists for lifters with elbow or wrist discomfort on the standard grip.
The reverse grip incline curl uses an overhand grip and trains the forearm extensors along with the brachialis, though it requires lighter weight than the standard version. Rotating grip work through your arm training over a few weeks, rather than doing the same grip every session, is one of the more overlooked ways to add detail to the arm without adding total training volume.
Unilateral incline curls, where you complete all reps on one arm before switching, let you fully concentrate on each side and can help correct a size or strength imbalance between arms. This costs more time per set, so it works best when arm symmetry is a specific goal rather than a default approach.
Incline Curl Versus Standing Dumbbell Curl
The standing dumbbell curl lets you move heavier weight because your torso can lean back slightly and your shoulders can help drive the dumbbell up, especially once you get past the sticking point. That extra leverage is useful for building raw strength, but it also means the biceps do less relative work per rep than they would in a strict incline position.
The incline curl removes that leverage almost entirely because your back is fixed against the pad and your arms hang behind your torso from the first inch of the rep. You’ll typically need to drop the dumbbell weight compared to what you’d standing curl, sometimes by a third or more, and that adjustment surprises a lot of lifters the first time they try it.
Neither version replaces the other. A standing curl builds general biceps strength and lets you train with heavier loads, while the incline curl isolates the muscle through a longer stretch and forces stricter form. Programming both across a training week, or alternating them by phase, covers more of what the biceps respond to than relying on a single curl variation alone.
Incline Dumbbell Curl Equipment Notes
An adjustable bench is the one piece of equipment you can’t substitute out of this exercise, since the angle is what creates the stretch that makes the movement worthwhile. Most commercial gym benches adjust in five degree increments from flat up to roughly 85 degrees, which gives you enough range to test a few settings and find what your shoulders tolerate best.
Dumbbell selection matters more here than in most curl variations because the stretched bottom position exposes any weight that’s too heavy almost immediately. Start two sizes lighter than your usual standing curl weight for your first working set, then adjust from there based on whether you can control the full range without your elbows drifting forward.
A bench with a low back pad, rather than a full vertical back support, can restrict how far your arms can hang behind your torso. If your gym’s incline bench feels shallow even at its steepest setting, a flat bench propped against a rack at an angle is a rough substitute, though it’s worth prioritizing gyms with a proper adjustable bench where the stretch position is easier to control.
Programming: Sets, Reps, And Placement
For most lifters training for size, three to four sets of eight to twelve reps per arm works well for the incline dumbbell curl, taking the last set close to failure with good form. Because the stretched position is demanding on connective tissue, it’s worth placing this exercise after a compound pulling movement like rows or pull-ups rather than as the very first exercise of an arm session.
Training to failure on every set isn’t necessary and can extend recovery time unnecessarily given how much stress the stretched position places on the biceps tendon. Leaving one or two reps in reserve on most sets, with the occasional set taken closer to failure, tends to hold up better across a training block.
Twice a week is a reasonable frequency for most intermediate lifters, spaced with at least 48 hours between sessions that heavily load the biceps. Beginners can often make progress on a single weekly session while they build baseline strength and connective tissue tolerance.
Progression doesn’t have to mean adding weight every week. Adding a rep or two at the same weight, extending the pause at the top, or slowing the lowering phase from two seconds to three are all valid ways to increase difficulty without risking form breakdown from jumping to a heavier dumbbell too soon.

Who Should Be Careful With This Exercise
Lifters with an existing biceps tendon injury, or a history of shoulder impingement, should approach the incline curl cautiously because the bottom stretch position loads both structures more than a standing curl does. Starting with a shallower incline angle and lighter weight, or checking with a physical therapist first, is a reasonable way to test tolerance before loading it heavily.
This is general exercise information, not a substitute for individualized medical or physical therapy guidance. Anyone returning from an injury should get clearance from a qualified professional before adding a deep-stretch exercise like this one back into a program.
Suggested schema: Article and HowTo schema both apply to this content given the structured step-by-step instructions; validate either against Google’s Rich Results Test before publishing. No review or rating schema should be added, since no product or star rating appears on the page.